Okay, so here's the first of many felt animal mask tutorials!
If you want to know the reason behind all of these, here is the post about them.
Anyway, on to the child's Penguin Mask Tutorial.
Supplies:
Penguin Mask Template
Sharp Scissors
Sewing machine
White Felt and White Thread
Orange Felt(Scrap) and Orange Thread
Black Felt and Black thread
Heavy Interfacing
Elastic
Pins
Click on the above template, print it and trace onto the non-shiny side of the Freezer Paper.
You may be able to print directly onto the freezer paper if your printer will allow it.
Mine, sadly did not, so I traced. Boo.
Loosely cut out each piece of the template.
Iron the Freezer Paper template pieces onto the felt with the shiny side DOWN,
and cut out using sharp scissors.
Cut:
2 head pieces in White Felt
(the one template piece can be reused)
1 head piece in the Heavy Interfacing
(by this point you may need to pin the template to the interfacing if it is no longer sticking)
1 "hair" piece in Black Felt
1 beak in Orange Felt
1 piece of Elastic to fit your child
(mine is 15", but measure for yourself)
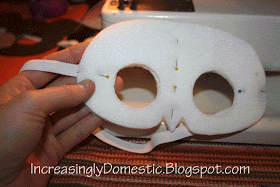
Stack the head pieces with the felt on the top and bottom and the interfacing on the inside.
Its hard to see on this mask because they are all white, but its like a sandwich.
Pin the layers so that they don't move during sewing. Tuck the ends of the elastic under one of the outer layers(between the felt and the interfacing)and pin it.
I tuck about a half inch, and factor that into my calculations before I cut the elastic.
Then zigzag stitch around the outside edge, as well as inside each eye. Don't stress on this too much. The thread is the same color as the felt so it really doesn't show up if you goof a little. Your kid will be WAY to busy waddling around like a penguin to notice any uneven stitches;)
Then straight stitch around the edges using matching thread.
Handmade :)
Then comes the fun part:) Pin the black "hair" piece on, so that the poor penguin looks like he's getting a rather involved session of acupuncture. This piece tends to move,
so really pin that sucker down! Then zigzag around the edges using black thread.
You're welcome.
Any questions? Did I leave anything out? Feel free to leave a comment with your questions and if you make one/some of these I would LOVE to see, so please share:)
You may find me linking up with some of these blogs:
Fingerprints on the Fridge, Making The World Cuter, Dittle Dattle, Mad Skills Monday, Skip to my Lou, Craft O Maniac, Delicate Construction, Ask Anna, New Nostalgia, House of Grace, Sassy Sites, Not Just a Housewife, Today's Creative Blog, My Craftie Life, Sew Much Ado, Seven Thirty-Three, Someday Crafts, A Diamond in the Stuff, My Girlish Whims, Somewhat Simple, Momnivores Dilemma, Paisley Passions, Fun to Craft, Make it, Wear it, Gluesticks, House of Hepworths, What Allie's Making Now, Finding Fabulous, A Little Knick Knack, Mommas Kinda Crafty, Its a Hodgepodge Life, Inspiring Creations, Be Different Act Normal, Wildflowers and Whimsy, Tatertots and Jello, The Idea Room, My Repurposed Life, Sew Many Ways, I Heart Naptime, Thirty Handmade Days, Under the Table and Dreaming, Creative Itch, Oops I Craft My Pants, Addicted 2 Decorating, CRAFT
DIY Home Sweet Home


You make everything look so doggone easy!!! Thanks for posting the tutorial, I can't wait to see more. Headed out for felt, Let the mask making begin ;-))
ReplyDelete